If you are reading this, I think it is a very high chance that you have already seen one of the components shown in the image above. Some popular sites like Quora, have implemented this "Google One Tap experience" and also the traditional "Sign-in with Google" button. Maybe you are wondering how does it work or how they have implemented this experience, so I am going to explain this in this post.
Google Identity Services its defined by Google as: "our new cross-platform sign-in SDK for Web and Android apps, supporting and streamlining multiple types of credentials".
In our case, and keeping the target to web apps, they provide to us "seamless sign-in and sign-up flows", such as:
- "Sign In With Google" button: personalized and customizable sign-up or sign-in button to our websites.
- "One-tap sign-up": allows sign up new users with just one tap of a button, no interruptions and users can end with a secure "password-less" account on your site protected by their Google Account.
- "Automatic sign-in": allows sign users automatically when they return to our site on any device or browser (even if the session expires).
This three points is what I will mainly cover in this post.
As shown in the main overview page of "Sign In with Google", basically this processes will allow/help us to quickly and easily manage users authentication and sign-in to out website. Users will sign-in, provide consent and we will securely receive their profile information.
- Pre-populate new accounts with the received information.
- SSO with Google Accounts without making the user re-entering passwords or usernames in other sites.
- Protect comments, voting or forms from abuse.
- Ease the user experience in your site by automatically sign in them when they return (or let them do so with simple click).
- Many other things that you can imagine...
If you would like to test it or integrate it with any of your websites, then... let's get started!
You only need basic HTML and JS knowledge to get started. All this setup process is done with JS libraries and HTML to place the buttons/modals.
Note: you may want to know the supported browsers and platforms before continuing.
The first thing we will do is to setup a Google API client ID and configure your consent screen. This is a pretty straightforward process and it is very well explained and documented here.
When you are ready with these and have the necessary data, you will have to load the client library in your webpage. This can be achieved with a little script tag like the following:
<script src="https://accounts.google.com/gsi/client" async defer></script>
This script tag can be included in the head tag of your website or in the body after all your content.
Note that we are including the keywords async and defer to optimize the page loading speed. It is important too to review your CSP to allow this script source and connection. Otherwise, you can download the source and serve it by yourself (I do not recommend this and I have not tested this approach).
After doing this, we are already loading the client library to support the "Sign in With Google" experience.
To finalize the setup, we will have to choose the components for our pages, which are basically a "Sign in" button or the "Google One Tap UX".
What Google recommends is to add the "Sign in" button on our main login pages and the "Google One Tap" to all pages in our sites and enable its "Automatic sign-in option".
In this case we are including the "Google One Tap UX" but adding the "Sign in" button is a straightforward process and also implemented in the demo webapp we will see later. If you want to know about adding the "Sign in" button checkout this links:
When configured, the login widget appears as a popup, and it will prompt the users to sign in or sign up with the existing Google account when any of these conditions are met:
- They are already logged in with their Google account.
- They are already logged in with their Google account in Chrome browser.
If you want to make users sign in when this conditions are not met, then you should display a simple "Sign In With Google button".
There are some points to know on how and when the Google One Tap experience can change:
- The process may show a pop-up window if we are using an unsupported browser or the dialog is covered with other content (as a security measure).
- Users can opt out of One Tap if they disable the "Google Account sign-in prompts" in their account settings. In this case One Tap will not display.
- The dialog of One Tap has an exponential cooldown when it is closed by the user. The dialog then won't display in the same browser or the last website visited for a period of time. When more times the user closes the prompt, the more time the prompt will not show.
- On mobile devices, One Tap will close automatically after a short time if the user do not interact with it.
After understanding the "flow", lets get the Google One Tap to display in our page.
In order to display Google One tap we can choose between JS and HTML. In my case I prefer to use JS and handle the logic there, but choose whatever fits you the most.
It is also important to choose if we will want to handle the response in the client side or in the server side. I will cover both in this post.
When handling the response in client side, a JS function will be triggered when the flow is completed. We can achieve this in HTML+JS or only JS as said above.
In JS (see comments inside for more information):
function handleCredentialResponse(response) {
console.log("Encoded JWT ID token: " + response.credential);
}
window.onload = function () {
google.accounts.id.initialize({
client_id: "YOUR_GOOGLE_CLIENT_ID",
callback: handleCredentialResponse
});
google.accounts.id.renderButton(
document.getElementById("buttonDiv"),
{ theme: "outline", size: "large" }
);
google.accounts.id.prompt();
}
In HTML:
<script>
function handleCredentialResponse(response) {
console.log("Encoded JWT ID token: " + response.credential);
}
</script>
<div id="g_id_onload"
data-client_id="YOUR_GOOGLE_CLIENT_ID"
data-callback="handleCredentialResponse"
data-your_own_param_1_to_login="any_value"
data-your_own_param_2_to_login="any_value">
</div>
Including this HTML code in our pages will make Google One Tap prompt when the client library of Google loads. We will have to replace YOUR_GOOGLE_CLIENT_ID with our client id and the data-callback attribute value with our JS function which Google will trigger to perform a callback (this a client-side approach). Additionally, we can specify custom data as the data-your_own_param_1_to_login and data-your_own_param_2_to_login attributes, which will be sent to the callback function.
When handling the response in server side, we will receive a call to an endpoint when the flow is completed. We can achieve this in pure HTML or pure JS as said above.
In JS (see comments inside for more information):
window.onload = function () {
google.accounts.id.initialize({
client_id: "YOUR_GOOGLE_CLIENT_ID",
login_uri: "https://your.domain/your_login_endpoint"
});
google.accounts.id.renderButton(
document.getElementById("buttonDiv"),
{ theme: "outline", size: "large" }
);
google.accounts.id.prompt();
}
In HTML:
<div id="g_id_onload"
     data-client_id="YOUR_GOOGLE_CLIENT_ID"
     data-login_uri="https://your.domain/your_login_endpoint"
     data-your_own_param_1_to_login="any_value"
     data-your_own_param_2_to_login="any_value">
</div>
Including this HTML code in our pages will make Google One Tap prompt when the client library of Google loads. We will have to replace YOUR_GOOGLE_CLIENT_ID with our client id and the data-login_uri attribute value with our login endpoint which Google will use to perform a callback (this a server-side approach). Additionally, we can specify custom data as the data-your_own_param_1_to_login and data-your_own_param_2_to_login attributes, which will be sent to the callback endpoint.
The Google One Tap experience can be customized in several ways. Here are some things you can do to customize it.
To do this, we only have to add the HTML attribute data-auto_select with a value of true to our HTML code as the following snippet:
<div id="g_id_onload"
     data-client_id="YOUR_GOOGLE_CLIENT_ID"
     data-auto_select="true"
     data-login_uri="https://your.domain/your_login_endpoint">
</div>
Note that the user must first be signed-in to their Google account and have previously granted consent to share their account profile with your app in order to automatic sign-in to work.
For sign out, we must take into account that we can enter a dead-loop UX if the user is redirected with a page with Google One Tap activated after the sign out. To avoid this, put the class g_id_signout on the button that performs the sign out of the user (this will prohibit auto-selection after a user signs out). This can be achieved as follows:
<div class="g_id_signout">Sign Out</div>
Also in JS:
const button = document.getElementById('signout_button');
button.onclick = () => {
  google.accounts.id.disableAutoSelect();
}
We can change the wording in the prompt indicating a context, in order to match our use case. We can use the following context with its corresponding wording:
| Context | Wording |
|---|
| signin | "Sign in with Google" |
| signup | "Sign up with Google" |
| use | "Use with Google" |
To specify the context, just add the HTML attribute data-context with a value included in the table above. For example:
<div id="g_id_onload"
     data-client_id="YOUR_GOOGLE_CLIENT_ID"
     data-login_uri="https://your.domain/your_login_endpoint"
     data-context="use">
</div>
By default, the prompt is always shown in the top-right corner of desktop web browser windows. To display it inside a container we can indicate the data-prompt_parent_id HTML attribute indicating an HTML element id which will be its container. Also we can establish styles to this element. For example:
<div id="g_id_onload"
     data-client_id="YOUR_GOOGLE_CLIENT_ID"
     data-login_uri="https://your.domain/your_login_endpoint"
     data-prompt_parent_id="g_id_onload"
     style="position: absolute; top: 100px; right: 30px;
            width: 0; height: 0; z-index: 1001;">
</div>
By default, it will close when tapping outside the prompt. If you want this behavior to change, use the data-cancel_on_tap_outside HTML attribute and set it to false. For example:
<div id="g_id_onload"
     data-client_id="YOUR_GOOGLE_CLIENT_ID"
     data-login_uri="https://your.domain/your_login_endpoint"
     data-cancel_on_tap_outside="false">
</div>
If you are using cookies, then you can toggle the One Tap display status if a cookie is present or not. To do so, use the data-skip_prompt_cookie HTML attribute and set it to the cookie name you want to use to toggle the display.
It is simple:
- If the cookie is not set or the value is empty, Google One Tap will behave normally.
- If the cookie is set and the value not is empty, Google One Tap will not display.
Example code snippet:
<div id="g_id_onload"
     data-client_id="YOUR_GOOGLE_CLIENT_ID"
     data-login_uri="https://your.domain/your_login_endpoint"
     data-skip_prompt_cookie="sid">
</div>
For this blog post, I have developed a simple frameworkless static site with a live demo you can try by yourself. Only HTML, CSS and JS are used... all is client side.

In the demo, a popup for Google One Tap will be shown in the top right corner and once you give consent to the application, it will be auto authenticate yourself in subsequent visits to the demo. There is also a "Sign in with Google" button in the case you dismiss the modal (to trigger the authentication), this button behaves similar to the modal, pre-selecting a Google account you are already authenticated with (this can be customized).
Here is a sample view of what happens when you authenticate:
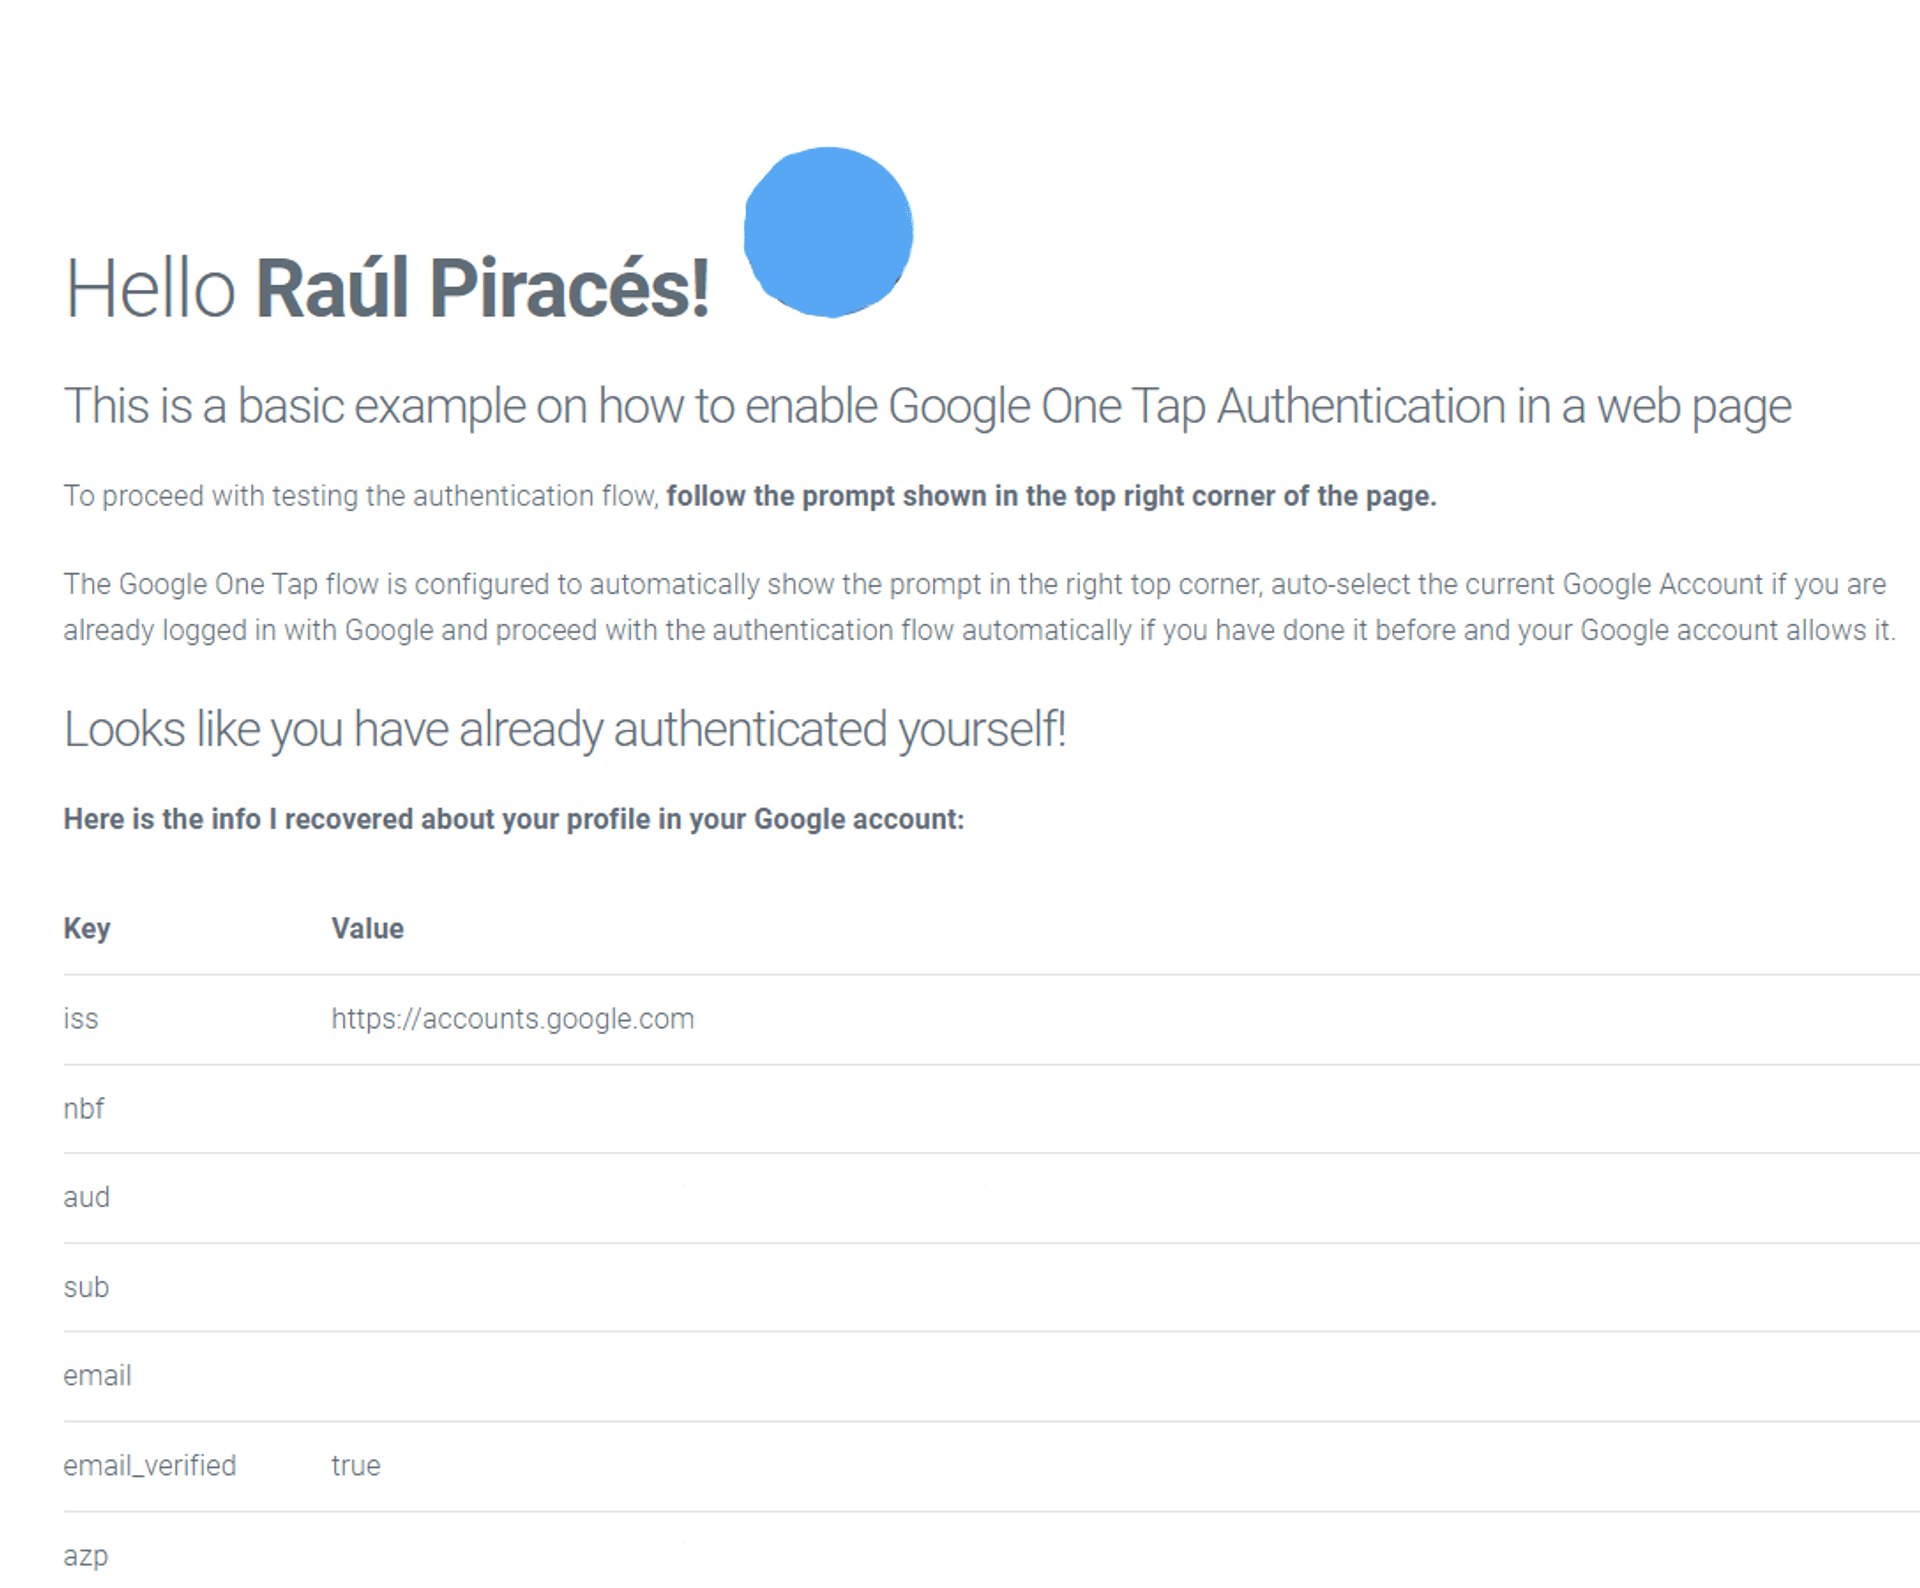
Note: The picture and possibly sensitive data has been removed from the image, but will be shown to yourself if you try it.
The following scopes are requested when you use the demo webapp:
| API | Scope | Description |
|---|
| - | .../auth/userinfo.email | See your primary Google Account email address |
| - | .../auth/userinfo.profile | See your personal info, including any personal info you've made publicly available |
| - | openid | Associate you with your personal info on Google |
Don't worry about the data or consent you are giving to this sample app, this data never leaves the browser. Trust me, I am not interested in collecting data in any way or do something with it. To do so, I would have to deploy some kind of service somewhere and I don't want and neither have time and motivation to do so. This is not an "excusatio non petita, accusatio manifesta", I only want to be clear with the treatment of your data. I invite you to check the source code for the demo.
In other case do not try the demo app 😢.
The are other "advanced topics" that this post does not cover and you may be interested to learn. So here is a set of different topics and links to go further:
Hope they are useful for you!
As shown and explained in this post, I consider Google One Tap a great, quick and easy "flow" to authenticate your users in a webpage or app.
It can be incorporated as a requirement to comment in your blog, vote in a poll, pre-populate an account information if the user is signing up in your app and lots of other things your imagination could think of.
What do you think? Would you use it?
Happy coding! 🎉🎉
🙏🙏🙏
Since you've made it this far, sharing this article on your favorite social media network would be highly appreciated 😀! For feedback, please ping me on X.
Published